Showing posts with label ribbon. Show all posts
June 04, 2012
Jubilant at the Jubilee...
We don't let a bit of torrential rain and freezing weather spoil our days...so here is Granny and two of my Aunts sporting the Jubilee headgear I made them and enjoying the Great British outdoors!! lol Pretty game to sit there for hours at 93, huh?? *Go Granny*
Actually, I think they came for the quiche and the pavlova as much as the Queen... ;0)
May 28, 2012
An unseasonal LO...Christmas at Berko!!
Hi everyone...its beautifully sunny here and so hot you could fry eggs on the pavement...so i thought i'd scrap a very unseasonal photo and immerse myself in cooler times. ;0)
I only allowed myself to use papers and cardstock from my scraps pile...and i even created the background pp with a scrap, some Versamark ink, a few mica powders and my hand carved damask stamp...did you spot it?
{To see the LO more clearly just click on it and it will pop up big enough for you to see all the details :0) }
The embellishments all came from the tray on my desk where I keep leftovers from other projects. The paper flowers are both dipped into UTEE after being coated in Brilliance ink, and the wire flower is held in place by a cute brad that was also in my tray.
I stamped the journalling block using an ancient stamp and rounded the corners to match the tag i've used (upside down) on the top left.
Its another case of, not feeling great so throw it all at the page and see what happens...but i'm quite liking how it came out! :0) And how can you fail to love the cheeky look on my BIL's face!!
I do hope you are managing to keep cool...and not get burned...but taking the opportunity to have an ice~cream or two!
I only allowed myself to use papers and cardstock from my scraps pile...and i even created the background pp with a scrap, some Versamark ink, a few mica powders and my hand carved damask stamp...did you spot it?
{To see the LO more clearly just click on it and it will pop up big enough for you to see all the details :0) }
The embellishments all came from the tray on my desk where I keep leftovers from other projects. The paper flowers are both dipped into UTEE after being coated in Brilliance ink, and the wire flower is held in place by a cute brad that was also in my tray.
I stamped the journalling block using an ancient stamp and rounded the corners to match the tag i've used (upside down) on the top left.
Its another case of, not feeling great so throw it all at the page and see what happens...but i'm quite liking how it came out! :0) And how can you fail to love the cheeky look on my BIL's face!!
I do hope you are managing to keep cool...and not get burned...but taking the opportunity to have an ice~cream or two!
February 13, 2012
Bubbly Scrumptious update...Valentine projects...
have you been over to the Bubbly Scrumptious blog to see my latest creations...i've gone all romantic for Valentine's day :0) if not...just click here!
who said Valentine's have to be red or pink, eh? ;0)
Labels:
altered items,
Bubbly Funk,
cards,
Design Team,
flowers,
gifts,
love,
ribbon,
stamping,
tags,
tim holtz
December 28, 2011
a little wine...bottle!
Hi there bloggers...i do hope you've all had a wonderful Christmas and are looking forward to the New Year celebrations.
Despite alot of illness throughout the whole family...we all managed to be well enough on the big day to spend a few hours together and had a thoroughly fabulous time...which i plan to scrap later today! :0) Have you scrapped your day yet??
Now...back to the wine...its not a Christmas whine...but a Christmassy bottle of mulled wine...a perfect but inexpensive gift {depending how much brandy you put in it}. I decorated this empty brandy bottle with Viva Decor Croco paint and tinted it with Saddle Brown Stazon to give it a lovely golden glow. I die cut the label using a Nestability die and stamped and embossed the words "a little festive spirit" in gold embossing powder using a PaperArtsy alphabet. I edged the die cut with Cranberry Adirondack ink using some cut and dry foam to add a little age and depth to the label.Obviously, the glass changes colour completely when you pop the mulled wine in...
To embellish the bottle i tinted some Prima flowers with the Stazon ink and then used Alchol Inks, dropping them directly onto the white pearl centres and letting the ink run along the veins in the flower. I then dipped the edges of the petals into drops of ink placed onto my craft sheet to get the coppery colour around the edges of the petals. Finally i added some Prima leaves and beads...and i think you have a pretty spectacular gift in minimal time...with maximun impact! The lace i've used was also tinted using the Stazon so all the colours tone beautifully which really helps to create a project that *works* and looks well thought out.
Now...who can you think of in your life that needs a bottle like this..? I think it would make a lovely gift to take to a New Years' Eve party...and if you're not a drinker...you could do a similar bottle and fill it with luxury bubble bath for an alternative kind of treat!
Happy New Year to you all,
alixxx
Labels:
alcohol inks,
altered items,
Christmas,
crafty makes,
flowers,
gifts,
pearls,
ribbon,
stamping,
tim holtz
December 19, 2011
I'm a creative girl!
ok...i think i can post if i don't add any pictures...which is a shame Mr. Blogger!!!
i've made a very vintage styled Christmas wreath...but if you want to see my latest creation you'll have to pop over to the IACW blog here :)
i'll be back later if i can get this to work...as i have other things to share...
*frustrated*
i've made a very vintage styled Christmas wreath...but if you want to see my latest creation you'll have to pop over to the IACW blog here :)
i'll be back later if i can get this to work...as i have other things to share...
*frustrated*
Labels:
altered items,
beading,
c,
Christmas,
Design Team,
flowers,
IACW,
ribbon
November 29, 2011
Bubbly Scrumptious update...a pop~up starcard for Christmas
hi all,
just to let you know i have a project up over on the Bubbly Scrumptious blog today...just click here to see it!
i hope you like it!
alix
just to let you know i have a project up over on the Bubbly Scrumptious blog today...just click here to see it!
i hope you like it!
alix
Labels:
Bubbly Funk,
cards,
Christmas,
Design Team,
mini books,
ribbon,
sissix
July 30, 2011
30 minute Thursdays...the pom pom coaster...on a Saturday!!!
ok...so there has been a definite lack of 30 minute Thursdays of late...but better late than never, here is the project i prepared but you never got this week! :0)
its a cute and practical coaster for your cup of whatever to rest on while and the colours can be adapted to suit your colour scheme...so why not give it a go..? a handful of these tied with string would make a super gift too ;0)
You need:
a coaster base ~ an unwanted coaster to recover, a coaster blank or as i've used some unwanted cork floor tiles die cut into circles in the Big Shot!
Tacky Glue {or similar strong glue}
String
Pom pom trim
Coat the entire top surface of your coaster with a thick layer of the Tacky Glue {i spread mine with a lolly stick} and apply your pom pom trim all the way around the edge. Overlap the ends slightly.
Next take your string and create a tight spiral starting in the middle of the coaster and winding round and round. Press the string into the glue as you go and it holds nicely :0) Don't worry if you're not exactly in the middle...this becomes obvious as you increase the spiral and you have plenty of time to slide into the right position.
When your spiral reaches the pom pom trim, apply a line of glue onto the trim {not the pom poms...the flat bit} and overlap your spiral to hold the trim firmly in place.
Trim your string to the right length and use a pokey tool to tuck the end underneath the spiral to finish off neatly and prevent little fingers undoing all your work...now leave to dry! The glue doesn't show at all in the dry version :0)
what now..? time for a cuppa i think and a sit back to admire your handiwork!
its a cute and practical coaster for your cup of whatever to rest on while and the colours can be adapted to suit your colour scheme...so why not give it a go..? a handful of these tied with string would make a super gift too ;0)
You need:
a coaster base ~ an unwanted coaster to recover, a coaster blank or as i've used some unwanted cork floor tiles die cut into circles in the Big Shot!
Tacky Glue {or similar strong glue}
String
Pom pom trim
Coat the entire top surface of your coaster with a thick layer of the Tacky Glue {i spread mine with a lolly stick} and apply your pom pom trim all the way around the edge. Overlap the ends slightly.
Next take your string and create a tight spiral starting in the middle of the coaster and winding round and round. Press the string into the glue as you go and it holds nicely :0) Don't worry if you're not exactly in the middle...this becomes obvious as you increase the spiral and you have plenty of time to slide into the right position.
When your spiral reaches the pom pom trim, apply a line of glue onto the trim {not the pom poms...the flat bit} and overlap your spiral to hold the trim firmly in place.
Trim your string to the right length and use a pokey tool to tuck the end underneath the spiral to finish off neatly and prevent little fingers undoing all your work...now leave to dry! The glue doesn't show at all in the dry version :0)
what now..? time for a cuppa i think and a sit back to admire your handiwork!
Labels:
30 minute Thursdays,
altered items,
crafty makes,
gifts,
ribbon,
tutorials
July 07, 2011
30 minute Thursdays...a fabulous star decoration...
Another Thursday quick project today...how to use what we learned on Monday's Bubbly Scrumptious Blog posting...not to make a starbook...but to adapt it to make a rather fabulous star shaped decoration! These are great for parties, children could even do them...and they'd be super for Christmas fairs if you want to use a little bit of stash to raise a whole load of cash! :0)
Firstly, cut yourself 21 strips of double sided pp, to the sizes listed below. This is really quick if you use your paper trimmer.
Secondly, use a wet glue to stick the sections together...one strip of each size, glued as shown below with a little glue on either end.
When your sections are all glued together, stack them by glueing one on top of another adding the glue as shown below:
Now add some ribbon with some strong tape and glue the first section to the last section, opening the star out to form the shape.
Your star should now look like this!
Add a flowery embellishment to the middle of the star with a generous amount of glue...this will help to stabilise the points if you've used thinnish pp...but it looks lovely even if you don't need it!
Warning:
You may well be asked to make lots of these...people do seem to be disproportionately impressed with the skill required to achieve these babies...but i won't tell if you don't!! ;0)
Labels:
30 minute Thursdays,
Birthdays,
Christmas,
crafty makes,
flowers,
gifts,
ribbon,
tutorials
June 30, 2011
30 minute Thursdays...personalised keychain...
Hi all...its Thursday again...so time for another 30 minute project...this week i've created a personalised keychain with a photo of my hubby on it. Of course, you're unlikely to want my hubby on your keychain...so feel free to add photos of your children, pets or favourite flowers...whatever you love!

Using the jump rings in the pace of facets, make a simple chain of 5 rings with the keychain on one end and the facet on the other. Take your charms and colour them by dabbing with alcohol inks and when dry {again about a minute unless you've totally soaked them!} add a dab of glitter glue with your finger for some subtle sparkle. Leave this to dry, then using two more jump rings attach the two charms to the chain.


Materials:
1 large Tim Holtz facet and the jump rings you get in the pack
Glossy Accents
2 charms of your choosing
alcohol inks
Stickles
a scrap of ribbon
a keychain
a scrap of pp
a photo
The first step is to adhere your pp to your facet using a smoosh of Glossy Accents. Move the facet around a bit {wiggle it} to spread the glue and allow it to dry for about 30 seconds. Cut carefully around the facet.

Next, adhere your photo to the reverse of the pp just as before, wiggling the facet for good adhesion...and allow to dry. Trim as before and using a pokey tool, remake the hole all the way through so you can attach the jump ring.
Using the jump rings in the pace of facets, make a simple chain of 5 rings with the keychain on one end and the facet on the other. Take your charms and colour them by dabbing with alcohol inks and when dry {again about a minute unless you've totally soaked them!} add a dab of glitter glue with your finger for some subtle sparkle. Leave this to dry, then using two more jump rings attach the two charms to the chain.
The final step is to simply tie on a piece of co~ordinating ribbon and attach keys!

And there you have it...a simple but personalised keychain perfect for a gift or as in my case, just for yourself...because *you're worth it* muahahahahaha
Labels:
30 minute Thursdays,
alcohol inks,
altered items,
classes,
crafty makes,
gifts,
jewellery,
love,
metal,
photos,
ribbon,
tim holtz,
tutorials,
wire
June 23, 2011
30 minute Thursdays...a very versatile pin...
Aesthetically i love this time of year and lately i've been very inspired by all the lovely flowers that are blossoming around me. Today's 30 minute project was inspired by the beautiful rambling roses my FIL grows...i hope you like it as much as i like the roses! ;0) its a simple rose pin that could be used for a myriad of things and in many situations...how about as a bag, coat or hat pin, a Wedding boutonnière {is that the right word??}, as an embellishment on a hairclip...

This is a super easy project and in fact you could create more than one in 30 minutes if felt so inclined! So what do you do?
First take a 40cm length of scalloped velvet ribbon and wind this around and around as you do when you're tidying up the tape measure. Let it slacken slightly and add a generous dollop of Tacky glue to a section of felt slightly larger than the coil. Trim the felt into a simple flower shape and layer another slightly larger piece of felt underneath, again trimming to a rough rose shape. Take a fancy pin {or create your own with regular pins and a few small beads} and push this into the centre of the rose. Now cut a piece of wide green ribbon for the leaves. Fold the ribbon in from both ends to the middle with a slight overlap...pop the pin through the middle hiding the ends and glue this into place. Finally, using small pliers bend the pin at a right angle and use this as a simple brooch attachment, or trim and glue on whatever attachment you prefer.
Easy, huh? This works well in all sorts of colourways and it looks so good in all sorts of places...mine has come to rest on the kitchen roll as i just loved the spotty ribbon agains the spotty towel!! ha haaa not a very practicle place really...i think it will come to rest permanently on my wicker type beach bag :0)

May 23, 2011
bubbly scrumptious update...beaded beauty LO

morning all...do you remember these beaded flowers i showed you how to make a couple of weeks ago? well today they are featured on a Prima Reflections LO over on Bubbly Scrumptious...along with a rosette made in the same way as my Everlasting Bouquet flowers...do pop over to see it...here!
thanks...and have a crafty week!
Labels:
beading,
Bubbly Funk,
Design Team,
flowers,
LO,
ribbon
May 05, 2011
30 minute Thursdays!
Wow its Thursday again...i swear i have no idea what time of day it is, let alone which day of the week what with all these Bank Holidays and royal events! So...thinking it probably is Thursday...i've designed a rather cute little any occasion card that can be completed in 30 minutes...i hope you like it!
Its basically an easel card, so first off take a white card blank and fold the front flap in half inwards, to create the triangle shape, as you see in the photo below :) That was easy, huh? now all we have to do it decorate it and create a step!

i've glued a strip of bobbly trim to the bottom of the card and then added my message {a rubon} and a gem to a strip of cardstock which i've attached with foam to raise it up. this is what holds the triangle flap in place.
i've decorated the top section by covering it with a scrap of pp that i adore {its a DCWV one} and edging it with ink from a big brush pen. my main embellishment is a simple stamped flower which i've coloured directly on the stamp, huffed on...and stamped onto white cardstock and cut out. the india ink pens i've used are one of my favourite things atm...and the stamp i've used is one of my hand cut ones...but you could use any flower you have to hand...or any suitable image you choose...
once my flower was stamped and cut out, i simply matted it with a paper frame i had and backed it with another scrap of pp...3 gems and a ribbon bow later...and its done! simply adhere the whole thing with more foam tape {only on the bottom half of the design so you can fold it, remember}...and the best thing about these cards is that even though they have a lot of dimension to them standing up...you can fold them flat for posting and fitting in the envelope...yay!
April 10, 2011
vintage cottage swap on UKS...
sometimes...when i fancy doing something a little bit differento to my usual crafty style...i look for a suitable swap to join in on UKS...this one was hosted by Smelly who sent us all a cottage template and challenged us to make vintage style art withing the shape.
i love how they are all different...and all i need now is a bookcase to display them on! ;)
many thanks to all who took part...Gail S, Lou, Sarah {aka Smelly},Karen and the un~named cottage creator too!
can you tell which one i made???
Labels:
altered items,
felt,
flowers,
grunge paper/board,
ribbon,
stamping,
templates,
UKS
March 11, 2011
metal mania...

this week's challenge over on the simon says stamp and show blog is to use metal...and i had to play along with that theme, right?
i've used 10 seconds studio metal and embossed it by hand, and with folders, i've inked it, stamped it, cut it out, glittered it...accented it with glossy accents and sanded it! i've also used metal tags, metallic glitter and metallic paint...as well as a couple of staples...so i think i've got the metal thing covered... ;)

one of the things i love about metal work is how versatile it is and how much dimension you can get into even a basically flat project...

i was particularly chuffed with how this rose turned out...its cut in metal and alcohol inked, then covered in distress stickles so its all sparkly...very vintage looking :)
ooooh....and i haven't shown you the whole thing...so...can you tell what it is yet??? lol
Labels:
alcohol inks,
altered items,
challenges,
craftroom,
Cuttlebug,
flowers,
metal,
ribbon,
sissix,
tags,
tim holtz
February 19, 2011
caption competition! :)
a little bit of fun for the week ahead...and a fun prize too :)
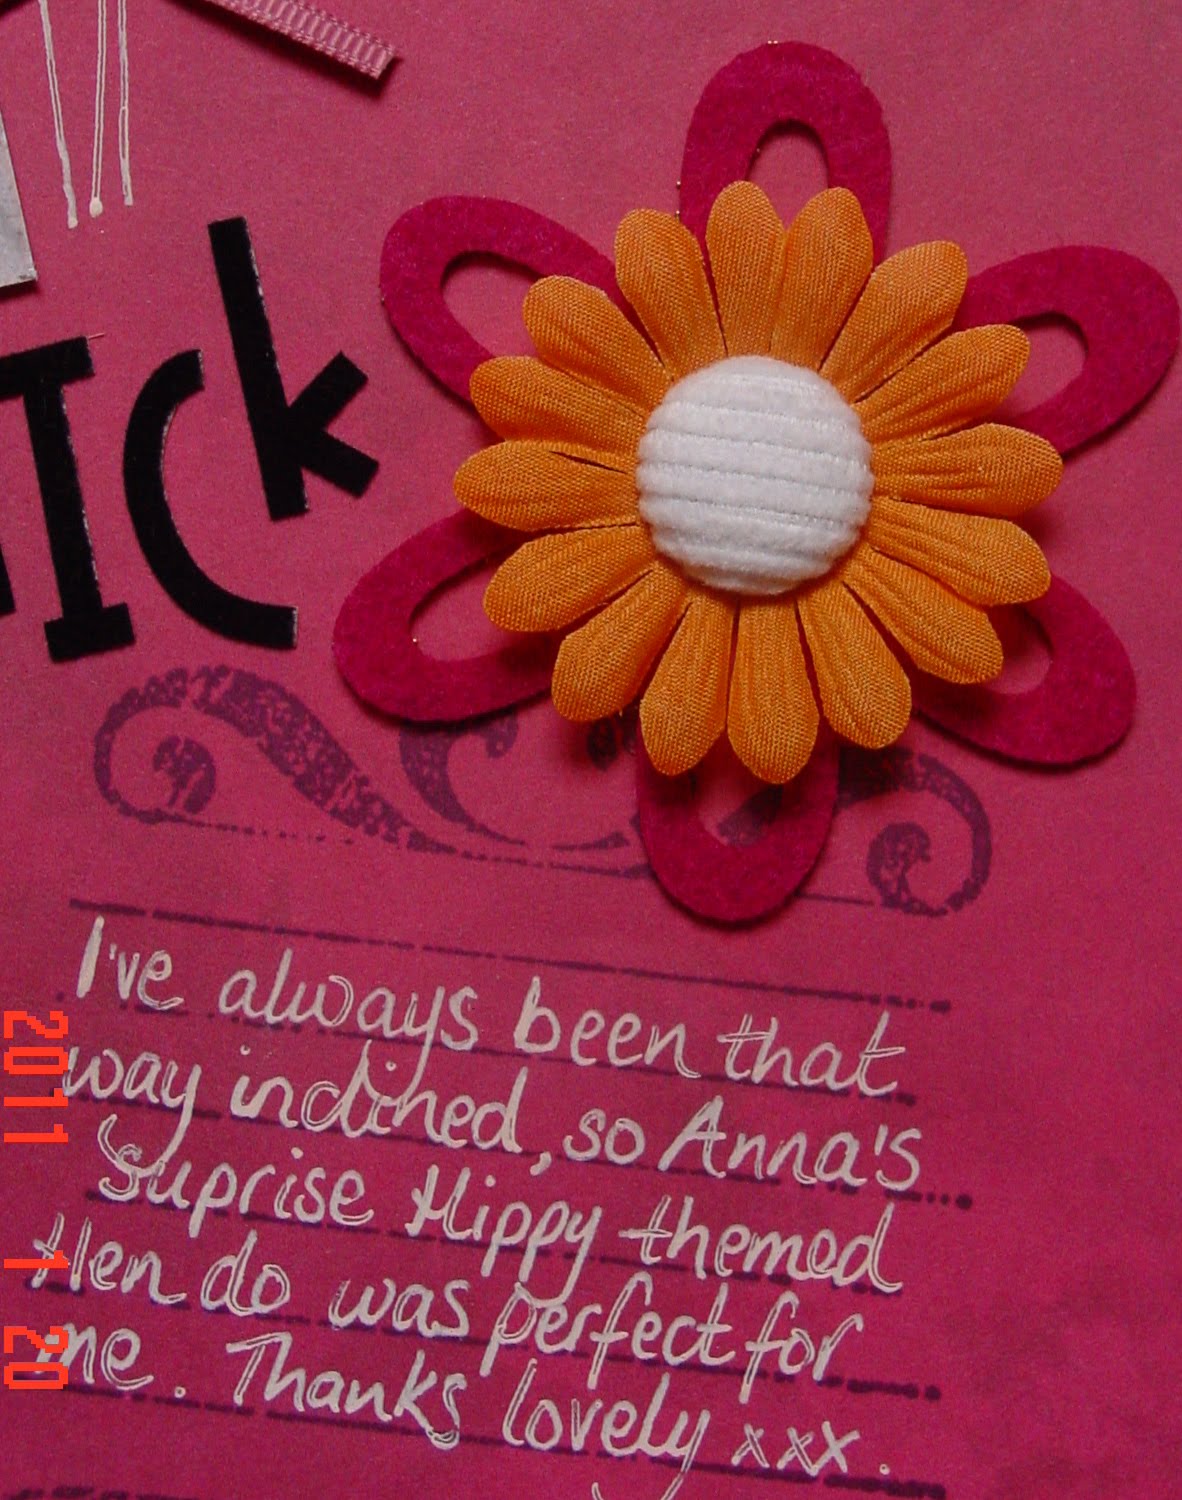
firstly a LO...this week i've been trying to finally scrap the photos from my hen~do...my lovely sister took it upon herself to organize a fun hippy themed fancy dress party for me which was a hoot...although i think i might have been the most enthusiastic about the dressing up part!! lol


with the hippy theme, it was important to include a serious amount of flower power on the page...and i really like to mix and match styles so...i've included printed flowers with brads for middles...

i also created my own hippy daisies by die cutting some orange leather i had from a sofa swatch and filling the middles with enamel accents and micro beads...and drawing on some simple stems with a white pen...

and i finished my trio of different floral embellishments with a layered flower created from a felt shape overlayed with a fabric on and a cordroy brad...i love how all the flowers work together...and i hope you do too!
firstly a LO...this week i've been trying to finally scrap the photos from my hen~do...my lovely sister took it upon herself to organize a fun hippy themed fancy dress party for me which was a hoot...although i think i might have been the most enthusiastic about the dressing up part!! lol

i've used a sketch for this photo of me {a rarity in that i actually like this photo of me} and its from the fabulous Pencillines sketch site...check it out here. The sketch is actually for their design team search...and i haven't applied...but i liked the sketch so i've used it anyway!

with the hippy theme, it was important to include a serious amount of flower power on the page...and i really like to mix and match styles so...i've included printed flowers with brads for middles...

i also created my own hippy daisies by die cutting some orange leather i had from a sofa swatch and filling the middles with enamel accents and micro beads...and drawing on some simple stems with a white pen...

and i finished my trio of different floral embellishments with a layered flower created from a felt shape overlayed with a fabric on and a cordroy brad...i love how all the flowers work together...and i hope you do too!
now...on to the fun caption competition...one of the reasons i've struggled so much to scrap this event is because everytime i get the photos out...i get the giggles and get lost in the memories of this fun evening...there are so many funny/silly/amusing photos but i've chosen this one for you all to write an amusing caption to:

please leave your caption and your details in the comments to this post...and next week i will pick a winner who will get a prize {related to what is actually happening in this photo!}

please leave your caption and your details in the comments to this post...and next week i will pick a winner who will get a prize {related to what is actually happening in this photo!}
so...i leave you to ponder and amuse yourselves with thinking of a caption that sums up what might be happening here?? you don't have to get the answer right...i'll pick the one that makes me and his Nibs giggle the most!
enjoy...but keep it clean please!! ;)
February 07, 2011
bubbly scrumptious update...
...do pop along and see my latest projects on the Bubbly Scrumptious blog...today i've made a ring and a card from one Tando chip shape for you...i hope you like them!
Labels:
altered items,
Bubbly Funk,
cards,
Design Team,
flowers,
jewellery,
melt art,
ribbon,
stamping,
tim holtz,
UTEE
Subscribe to:
Posts (Atom)